Hands On: Confluent Schema Registry


Danica Fine
Senior Developer Advocate (Presenter)
Hands On: Confluent Schema Registry
In the previous exercise, we set up a source connector to generate sample data for us according to a predefined schema and formatted that data as JSON on the Apache Kafka topic. In this hands-on exercise, we'll work through a similar workflow as before, this time seeing how we can write and serialize the data using Avro and leverage Schema Registry to manage our schemas.
-
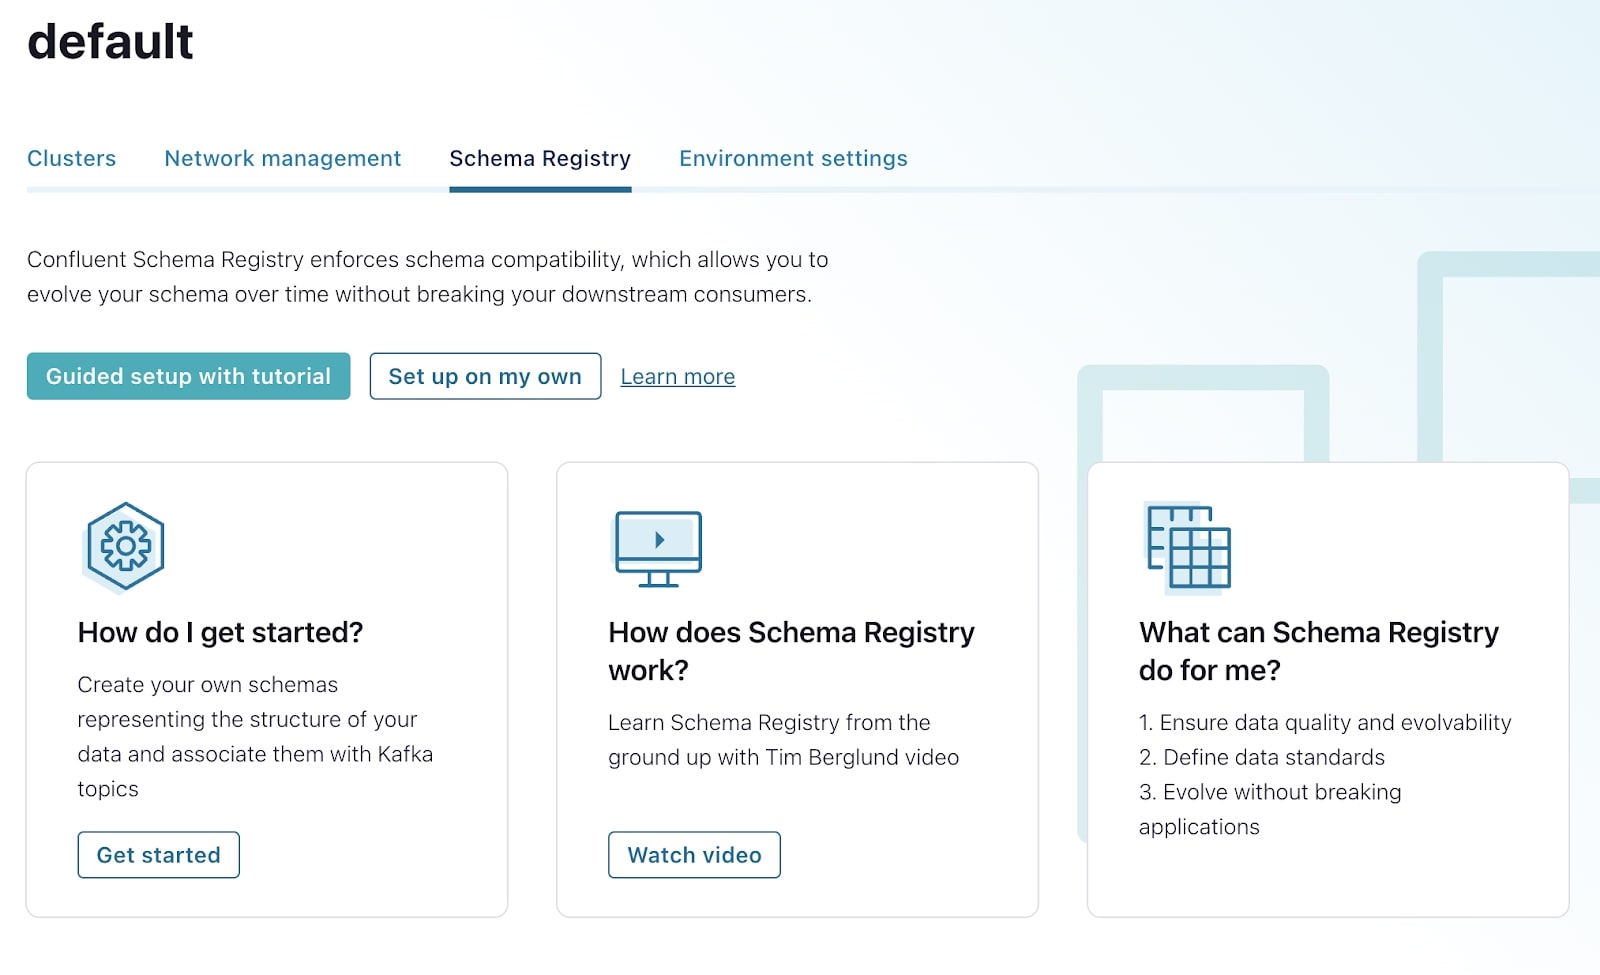
From the Confluent Cloud Console, select Schema Registry from the lower left-hand corner.
-
Continue by selecting Set up on my own. Then follow the prompts.
-
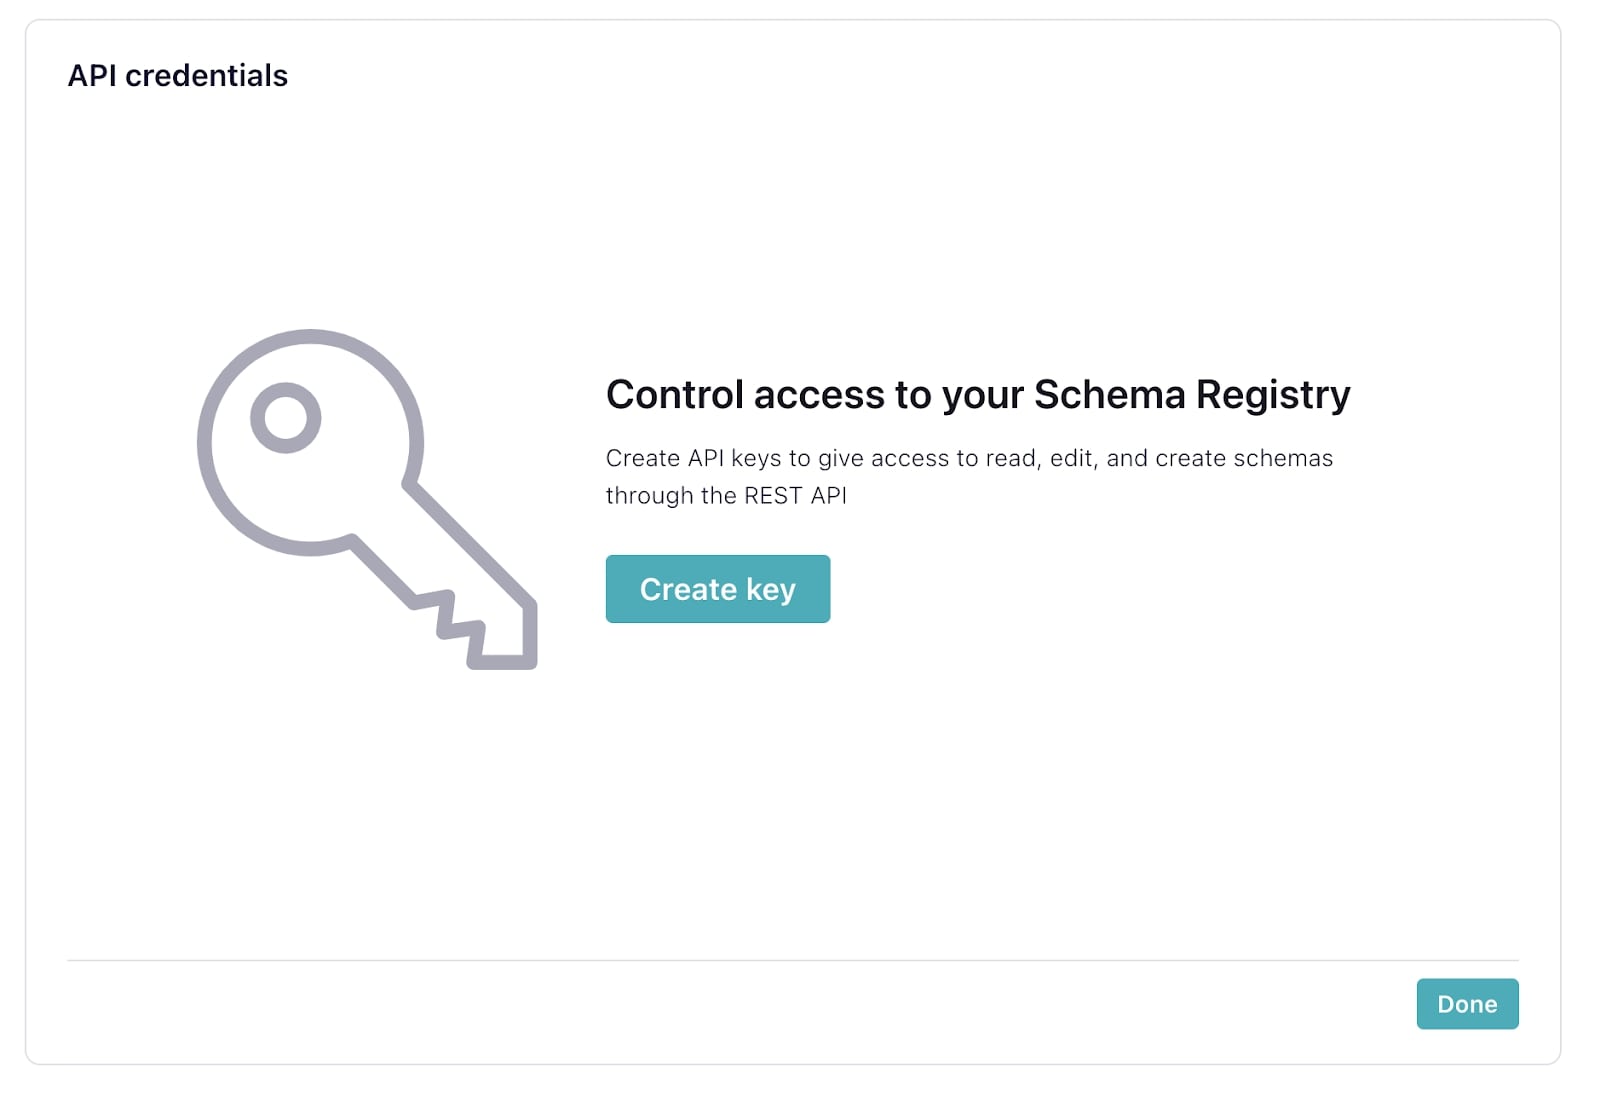
Once Schema Registry has been set up, from the Schema Registry landing page, scroll down to the “API credentials” section. To use Schema Registry from the command line later, you need to configure an API key and secret. Select the edit icon.

Select Create key and follow the prompt. Store this API key and secret for use in a later step.
-
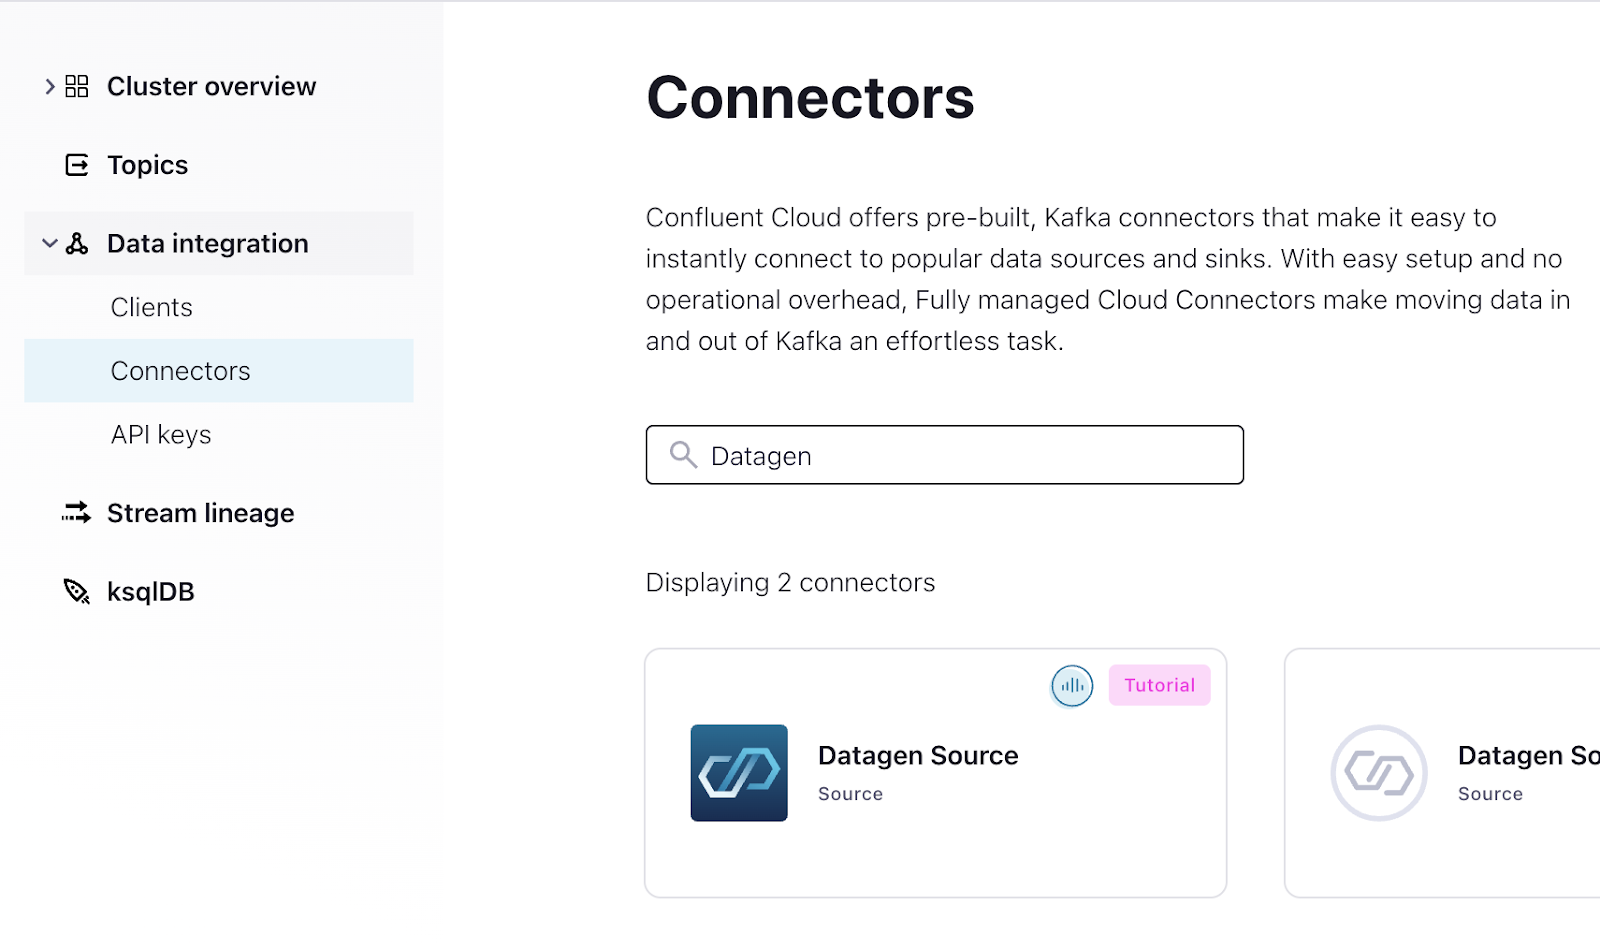
Navigate to the cluster overview page. Then, under “Data integration,” select Connectors.
-
If you have no connectors, this page will take you directly to the connector search page, so you may skip to step 6. Otherwise, this page will display your existing connectors, so you’ll need to select Add connector to get to the connector search page.

-
Once you’re on the connector search page, from the connectors search bar, enter “Datagen” and select the Datagen Source connector.
-
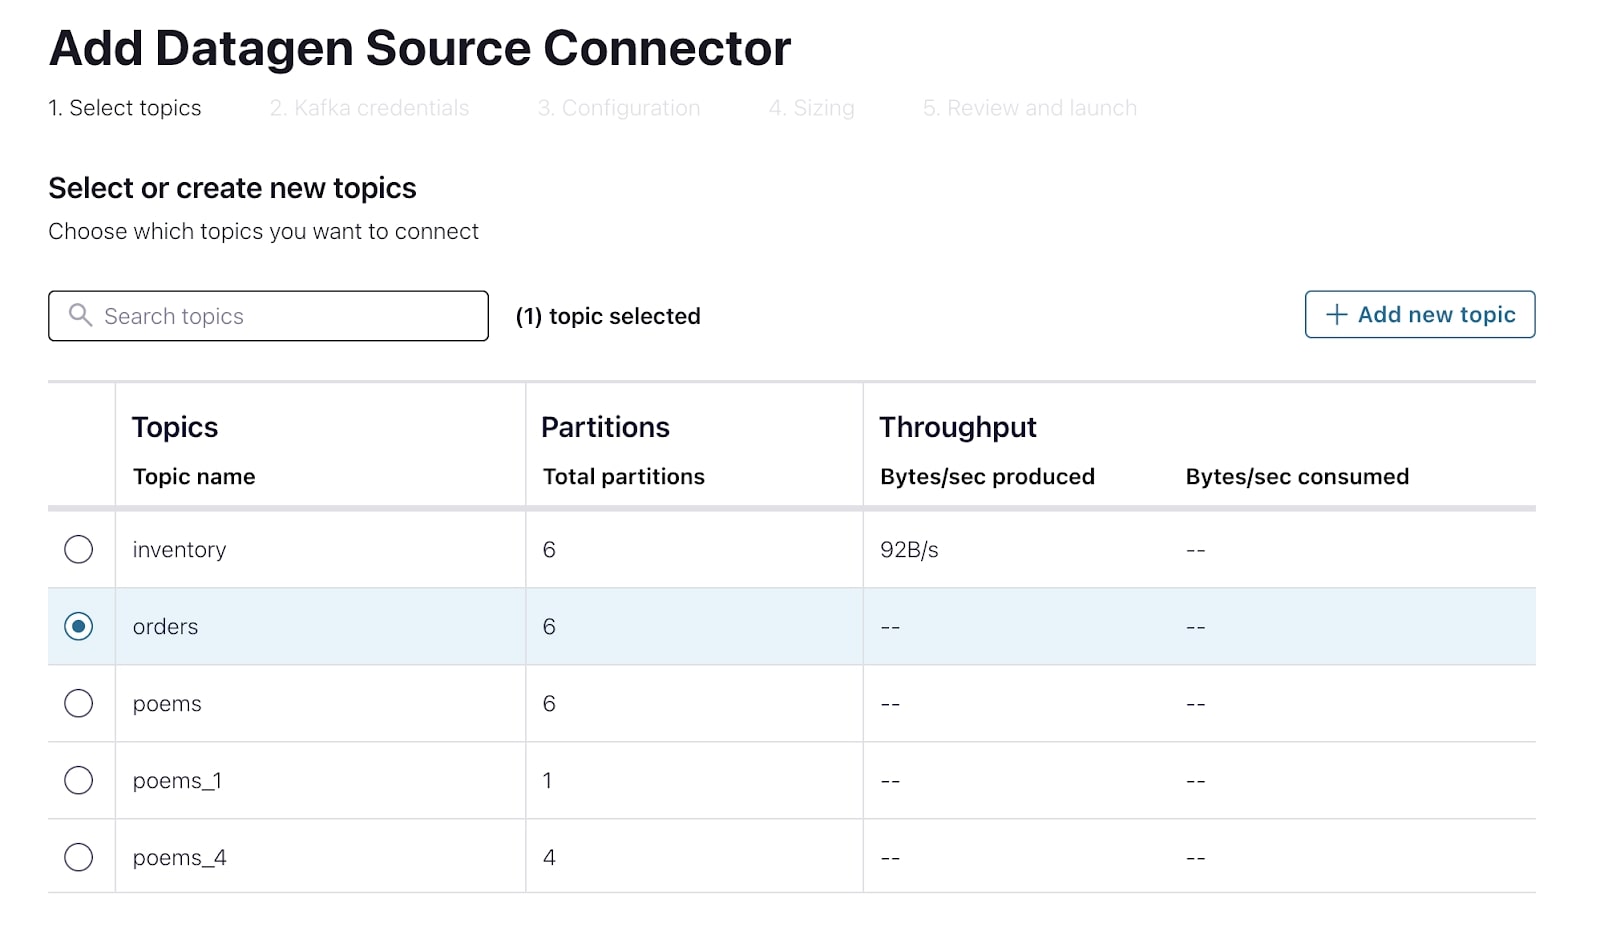
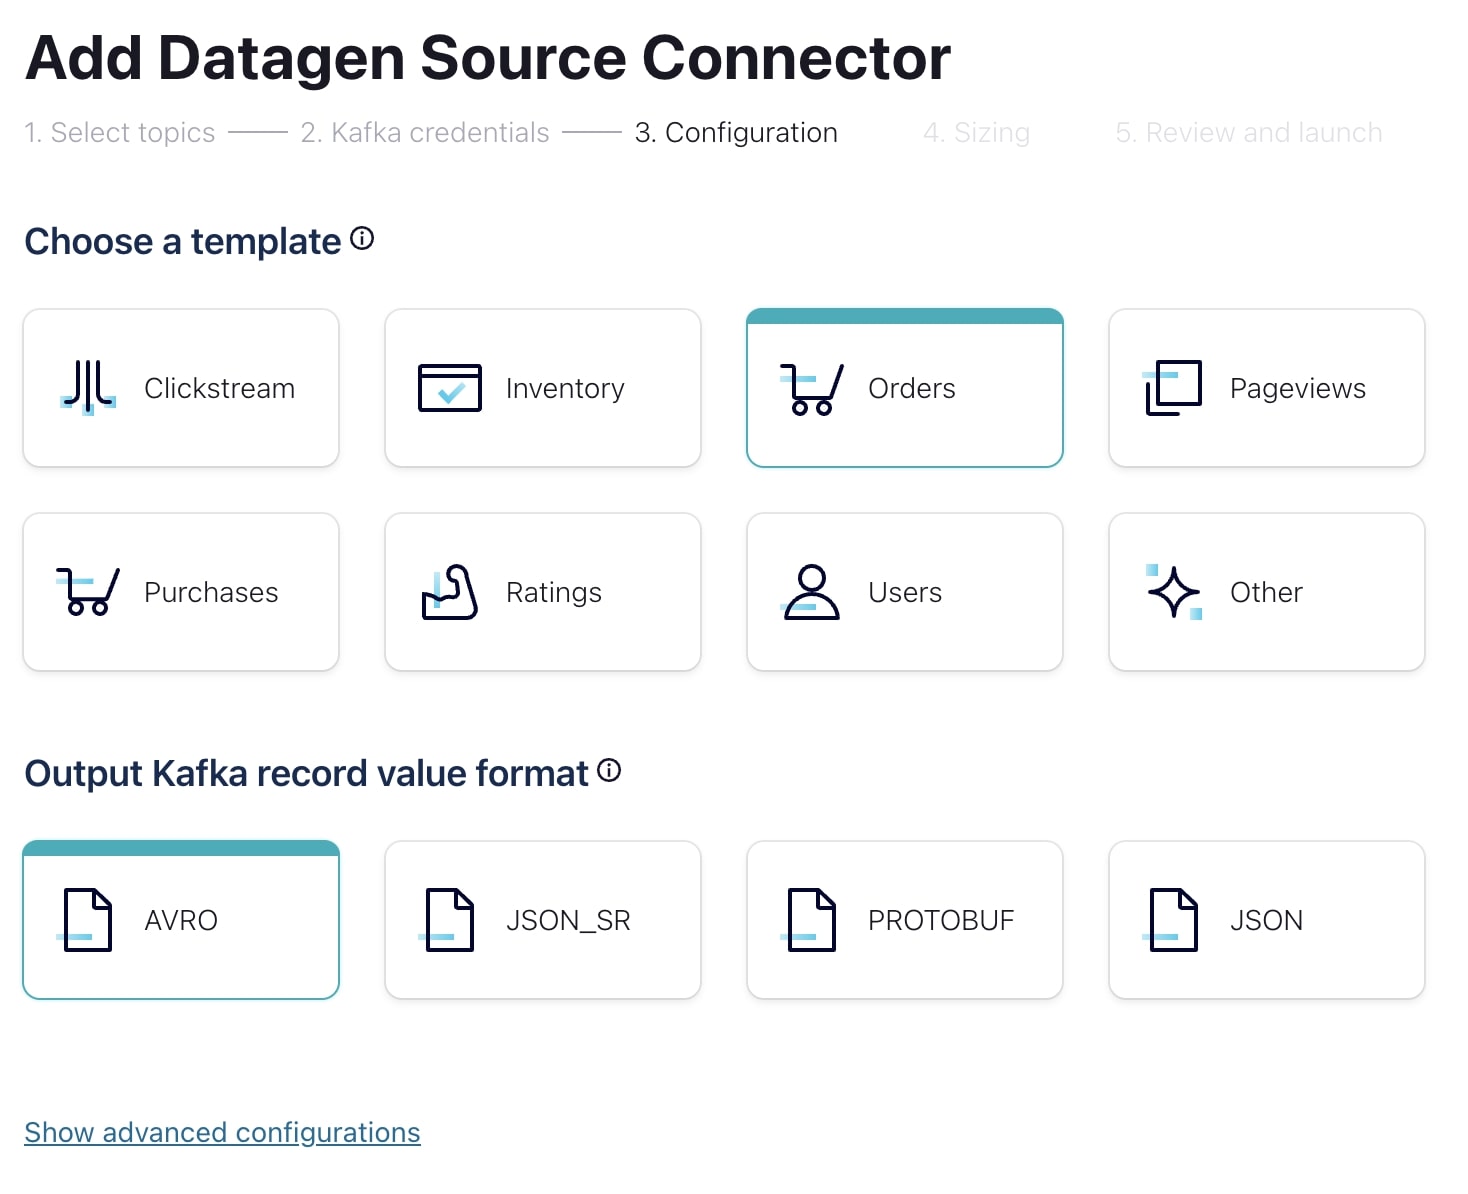
Provide a topic for the connector to produce data into. You can do this directly as part of the connector creation process. Select Add a new topic. Call it orders, and Create with defaults. Select the new orders topic and Continue.
-
Create a new API key for the connector to use for communicating with the Kafka cluster. Select Global Access and Generate API key & Download. Then Continue.
-
The Datagen source connector can auto-generate a number of predefined datasets. Select orders and, this time, serialize the messages as Avro.
-
Select Continue twice to first review the cost of the connector and then to give the connector a name and confirm the configuration choices.
-
Click Launch to start the connector. It may take a few minutes to provision the connector.
-
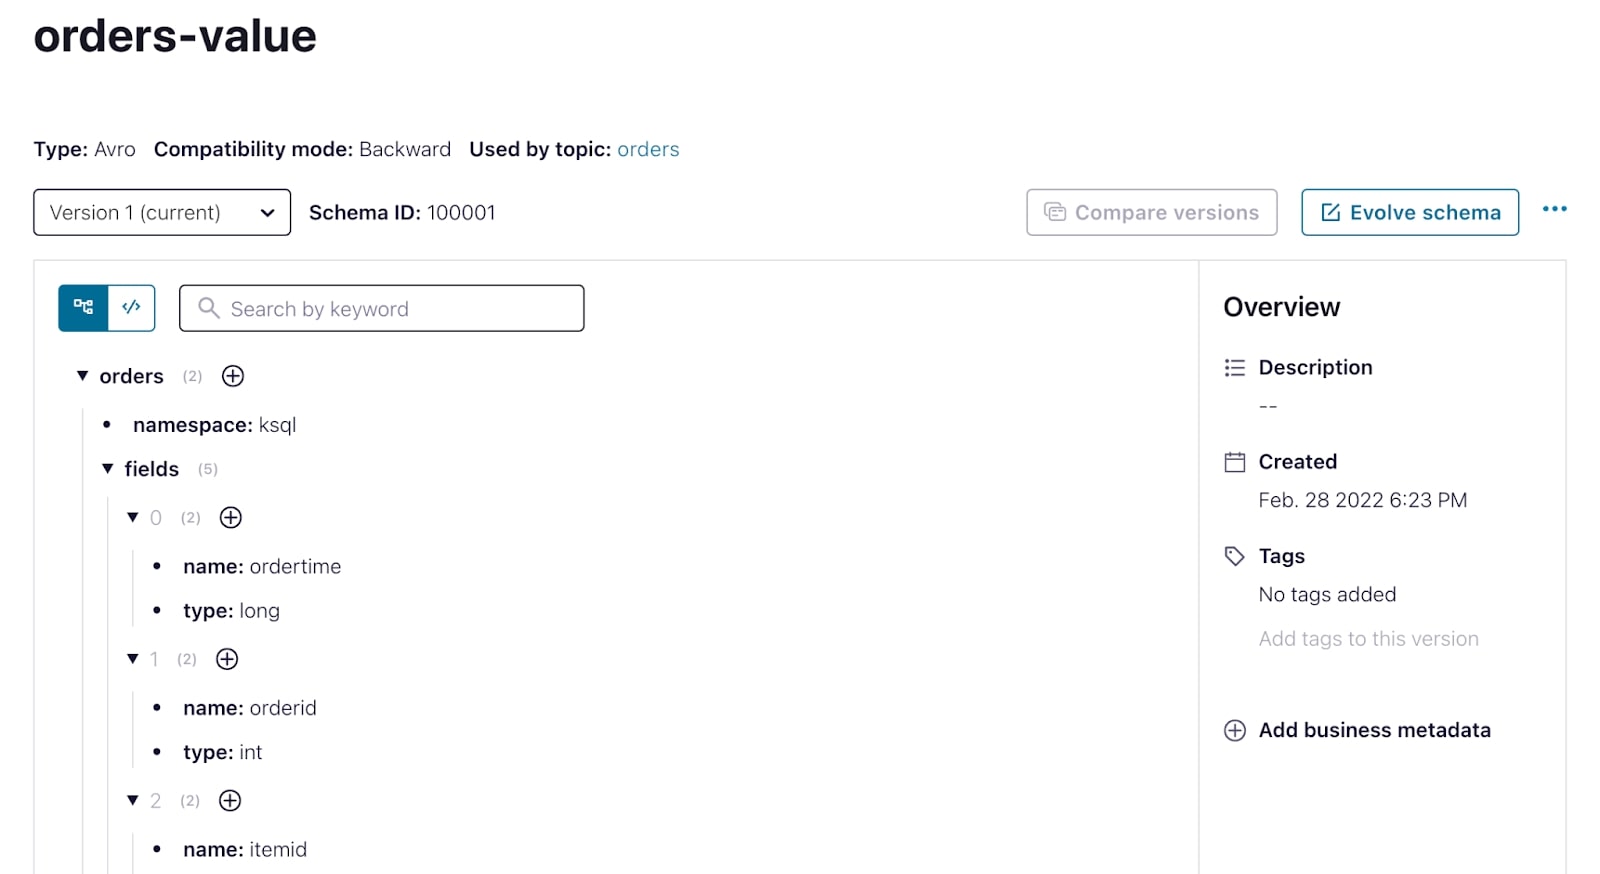
With the connector running, navigate to the Schema Registry page to have a look at the Avro schema that has been set for the orders topic. Select View & manage schemas.

-
From there, select the orders-value schema and view its fields.
-
From a terminal window, consume messages from the orders topic. If you’re curious, start by using the same consume command as in the previous exercise.


confluent kafka topic consume --from-beginning ordersYou might have noticed that the data is more or less gibberish with a few recognizable strings. Because the data is serialized to the topic using Avro, before we can read it, the consumer needs to deserialize it. What we’re seeing here is Avro data that is read as if it’s just a regular string.
- To do this the right way, tell the consumer to fetch the Avro schema for this topic from Schema Registry and deserialize the data first.
confluent kafka topic consume --value-format avro --schema-registry-api-key {API Key} --schema-registry-api-secret {API Secret} ordersYou’ll see the deserialized data being output.
Schemas are a great addition to your system if you’re looking to create a robust data pipeline and ensure data correctness across applications. Through this exercise, we saw a bit of this in action. We serialized data from a source connector as Avro, leveraged Schema Registry to store and manage that schema for us, and created a consumer that was able to consume and deserialize that data after connecting to Schema Registry.
Now you have all the tools that you need to start using Schema Registry in your own applications.
Use the promo codes KAFKA101 & CONFLUENTDEV1 to get $25 of free Confluent Cloud storage and skip credit card entry.
Be the first to get updates and new content
We will only share developer content and updates, including notifications when new content is added. We will never send you sales emails. 🙂 By subscribing, you understand we will process your personal information in accordance with our Privacy Statement.
Hands On: Confluent Schema Registry
In the last exercise, we set up a Source Connector to generate sample data for us according to a predefined schema, we then formatted that data as JSON on the Kafka topic. Now don't get me wrong, JSON is great for a lot of use cases, but if you're looking to increase the robustness of your data pipelines and ensure data correctness across all areas of your system, you really can't go wrong with a good schema. In this hands on exercise, we'll follow a similar workflow as before, but this time we'll see how we can write and serialize the data using Avro and leverage Confluent Schema Registry to manage our schemas. Let's get started. We'll start off in the Confluent Cloud console where we first need to enable the Schema Registry. In the lower left hand corner of the screen select Schema Registry. Here, you can either walk through the guided setup or set up Schema Registry on your own by selecting your desired cloud region. With that out of the way, we can move on and create another Datagen Source Connector. Navigate to data integration and select Connectors. The first thing we have to do is provide a topic for the Datagen Connector to produce data into. You can either create a topic ahead of time and select it from the list here, or create a new topic right from this screen. Let's create a new topic called orders, and set it with all the default configurations. As usual, in order for our Connector to communicate with our cluster, we need to provide an API key for it. You can use an existing API key and secret or auto create one here. There are a number of quick starts available to you with predefined schemas. We'll select the orders data template, and this time we'll format these output messages using Avro. Let's confirm the Connector configuration and launch it. It can take a few minutes to provision the Connector. While that's happening, I wanted to take a moment to explain in more detail why we're choosing to use schema here. When writing data as JSON, we see that it's a lump of data, but with a schema we could perhaps infer or make assumptions about the data just by eyeballing it. With a serialization format like Avro, we also get the benefit of an explicitly declared schema. So there's no guesswork. All right, now that our Connector is up and running, we can go and have a look at the Avro schema that's been set for this output topic and conveniently stored for us in the Schema Registry. You can see all schemas that are in your environment by going to the Schema Registry tab near the bottom left of the screen. From here, you can view and manage all of your schemas and make changes to them if need be. The schema for the value portion of the messages in our orders topic is called orders-value. Similarly, if we were to provide a schema for the key portion of this topic, it would be called orders-key. Select the schema to see all of the fields, their data types, and any constraints, such as nullability that the Datagen Connector has declared for the schema. Before we can consume these messages in the command line, we first need to create an API key for us to connect to the Schema Registry from the command line. Go back to the previous page and create a new Schema Registry API key and secret, store these safely somewhere. Now we can head over to the terminal where we can consume data from the topic. As an exercise in curiosity, let's see what happens if we use the same consumer command from before. You might have noticed that the data is more or less gibberish with a few recognizable strings. Since the data is serialized to the topic using Avro, before where we can read it, the consumer needs to de-serialize it. What we're seeing here is Avro data, but read as if it's just a regular string. So let's do it the right way and use the value format parameter to tell the consumer to de-serialize the value part of the data as Avro. Since it's Avro we also need to tell the consumer what credentials to use for connecting to the Schema Registry where the actual schema itself is stored. If we incorporate that into the consume command, you should now see the messages in all of their well formatted glory. As I mentioned earlier, schemas are a great addition to your system if you're looking to create a robust data pipeline and ensure data correctness across applications. Through this exercise, we saw a bit of this in action. We serialized data from a Source Connector, as Avro, leveraged Schema Registry to store and manage that schema for us, and create a consumer that was able to consume and de-serialize that data after connecting to the Schema Registry. After all of that you have all the tools that you need to start using Schema Registry in your own applications.